Return to the Blog Page
Making Silicon/Jacket mould
Remember your mould, at most, will only be as good as the Master you are to create from.
So if you want to do it proper, try not to take a Cast from an item which is in poor condition like we had below!
lets look at this item in situ, we need to reproduce, not very nice in detail to begin with

Details of taking a cast in situ is not in this tutorial, but will be having one to show you.
So, lets start
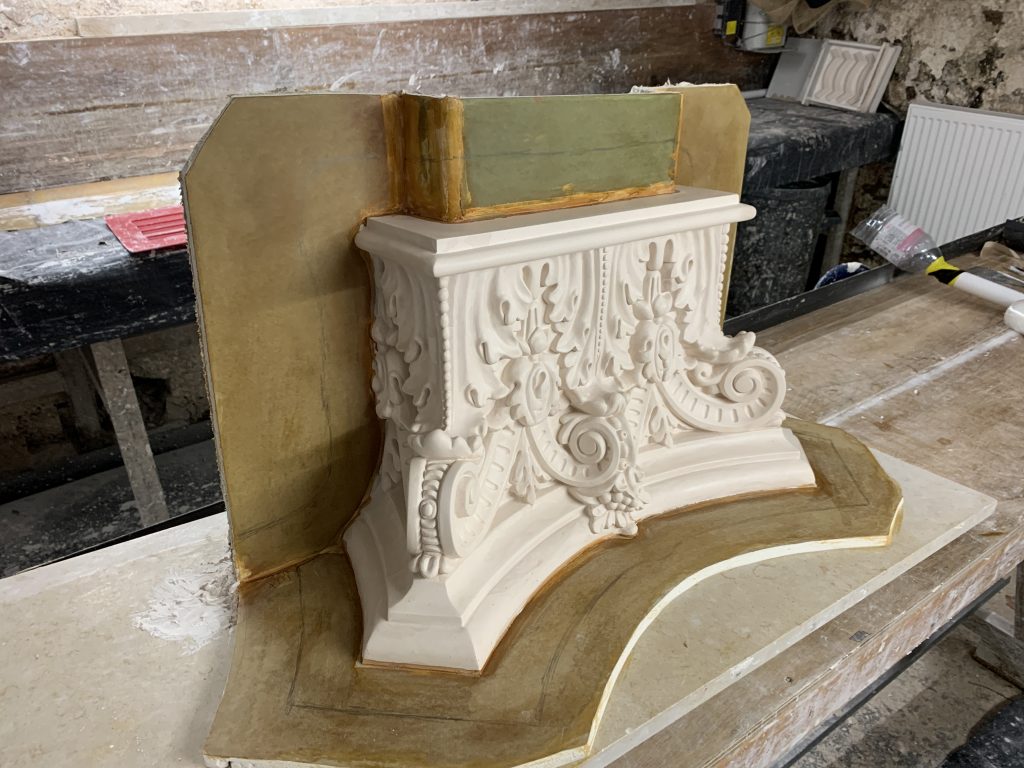
A moulding taken from in situ or from Site, 9 times out of 10, may not be completely to your liking for one reason or another, in our case the enrichment and detailing had all but disappeared along with one side missing.
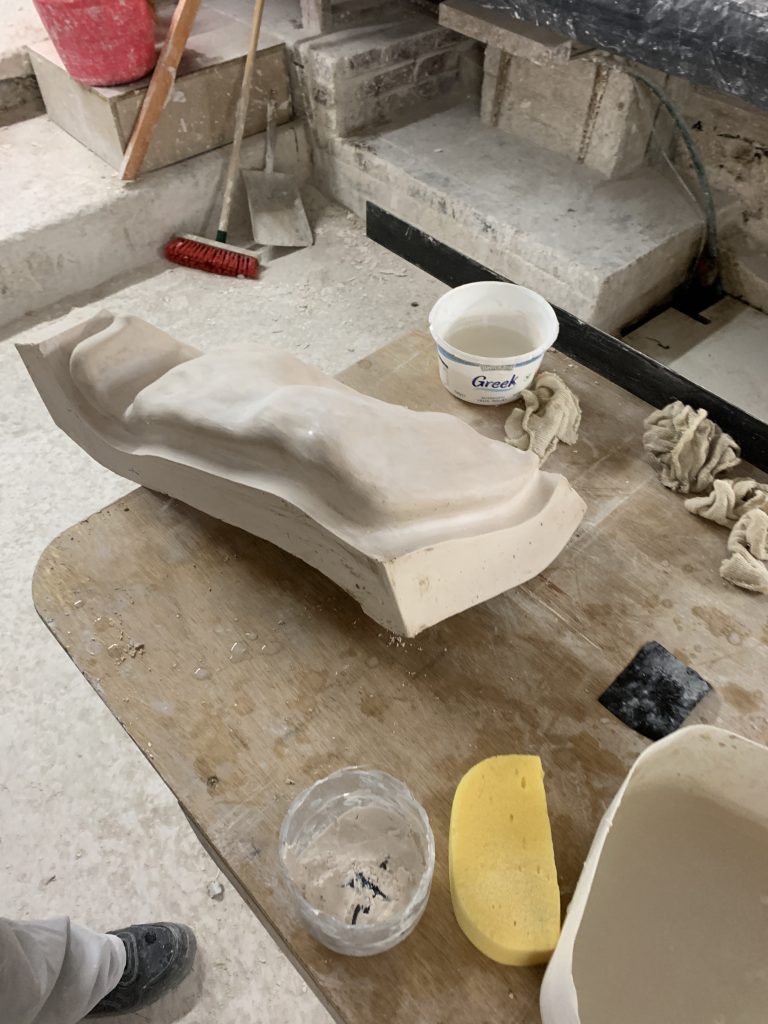
The item we need to clean up now sits on our bench, prior to any casting, it needs to be re sculptored before any mould making work commences.
Before and after Photos:
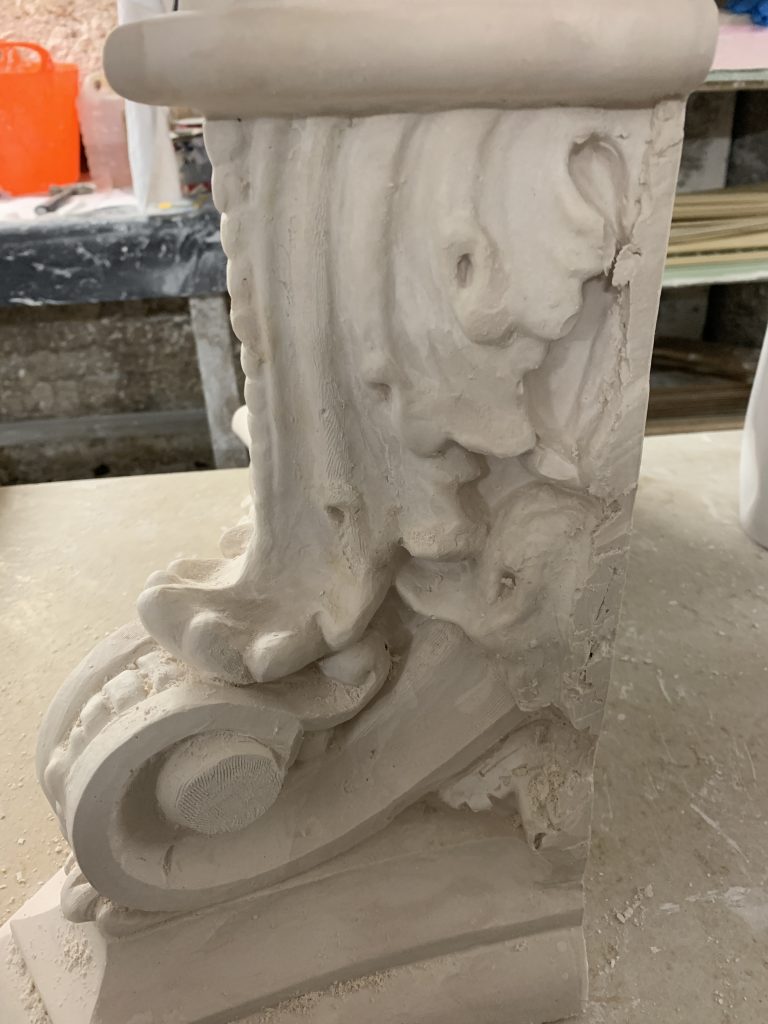
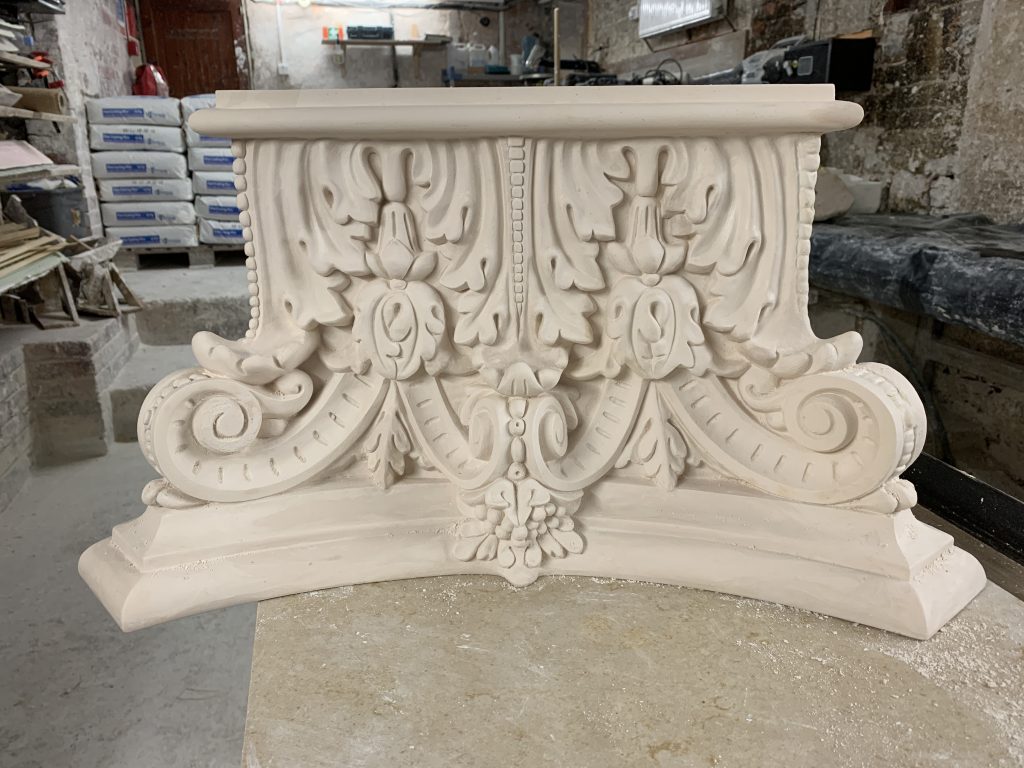
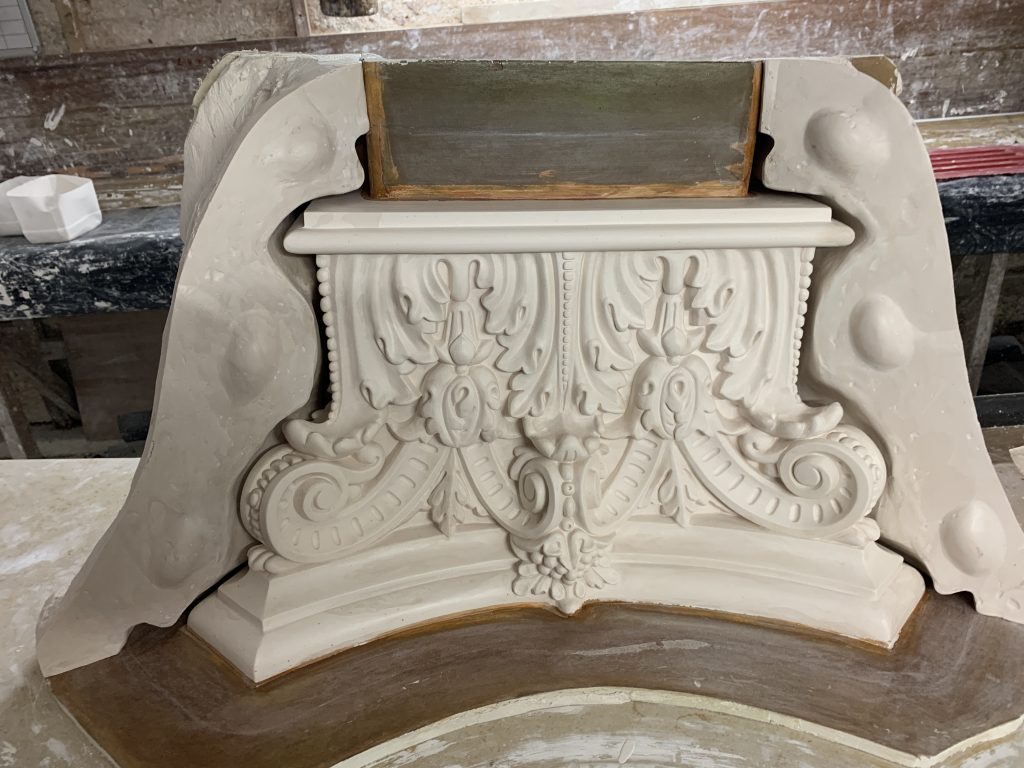
Much of the detail in our example was either missing or weak detailed, we cleaned the Master prior to any moulding work
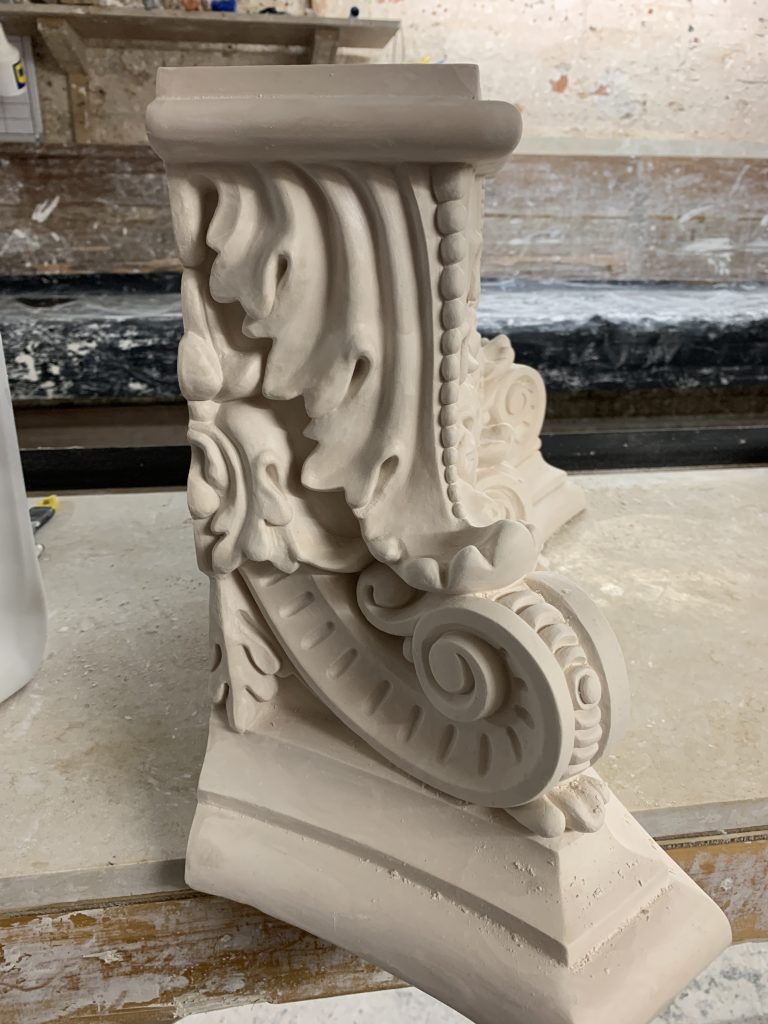
After
Below shows the piece Face on, this is work in progress, it shows the left side cleaned up, however if you compere the beads on the right side, you will see the difference prior and after resculptoring.
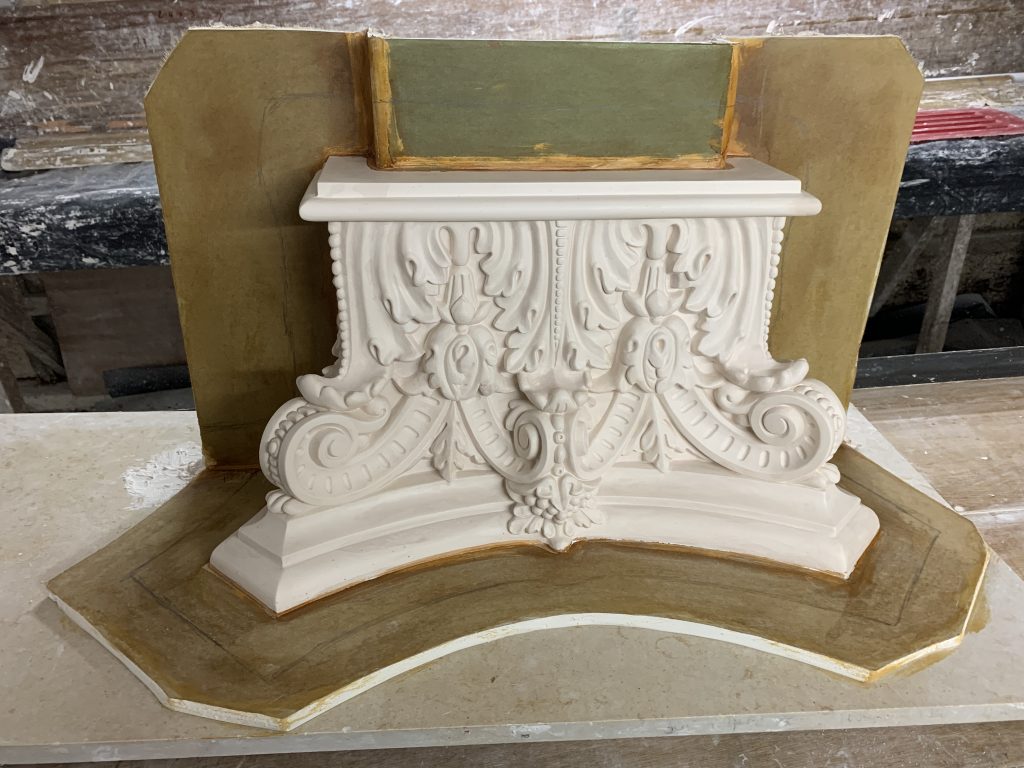
Once your Master is cleaned up, or if you are lucky enough to have a good item to reproduce, then you are ready for stage 1.
First of all, sit the item to: in this instance, 2 sections of plasterboard to form a base and rear wall, making a (right angle) make sure it is 45 degrees (square) if your Master is Plaster, use plaster adhesive to tie both boards together and carefully craft the adhesive, perfect with utility knife & Wet n Dry waterproof sandpaper, repeat if necessary!
.
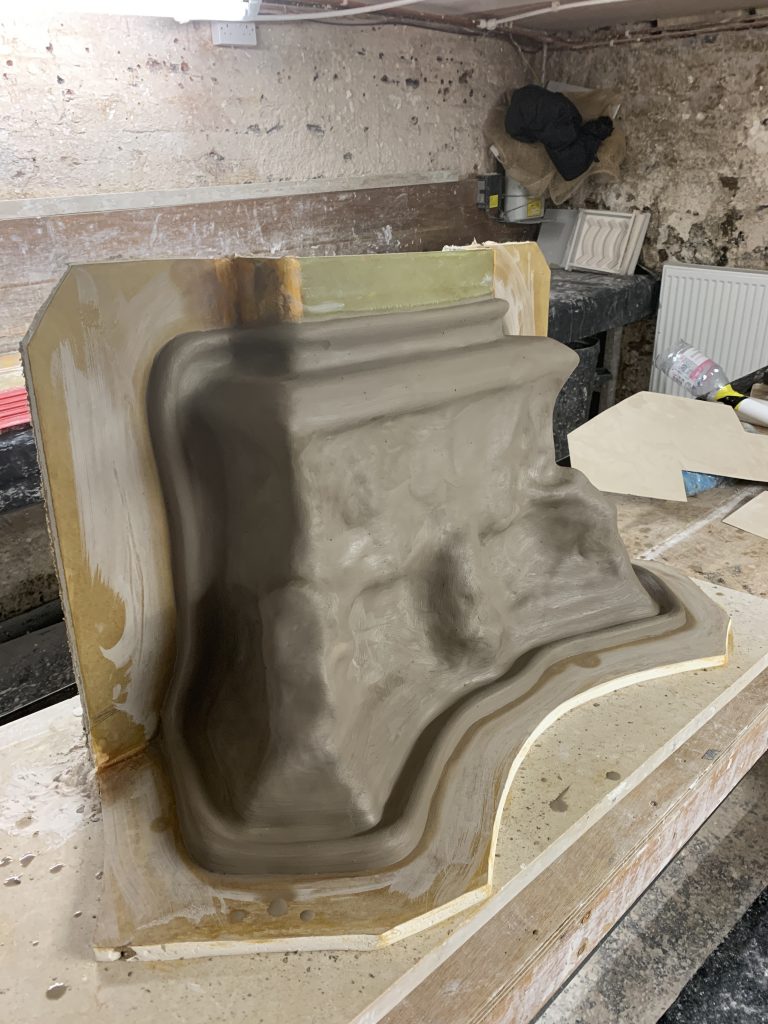
When making a silicon mould, we remove the absorbent nature of the plasterboard by coating it with with a couple of coats of shellac knotting. As you can see from the photos below, we are now ready to Clay up (This is where the Silicon will be in place of the Clay, later on)
Yes you need some Clay and cling film, strange I know, but you will need to clay up the surface of the product only after you have protected your work of art with cling film first!
I will explain again, you are now going to apply cling film over the Product itself, then apply the rolled out Clay over the areas where it will later be replaced by silicon rubber
Dont get lost here, as all depends on it! if your silicon, let’s say is to be 3/4inch thick or whatever you choose, you need to roll clay sections of this thickness on a table between 2 table gauges, so 3/4 inch (in our case) with something like a rolling pin, after you have cut and placed cling film over your (to prevent it from marking/damage, join many sections of clay working from the bottom, upwards and join the seems with more clay, or a putty knife or similar is good, you will end up with something like (Below Photo)
From Another angle

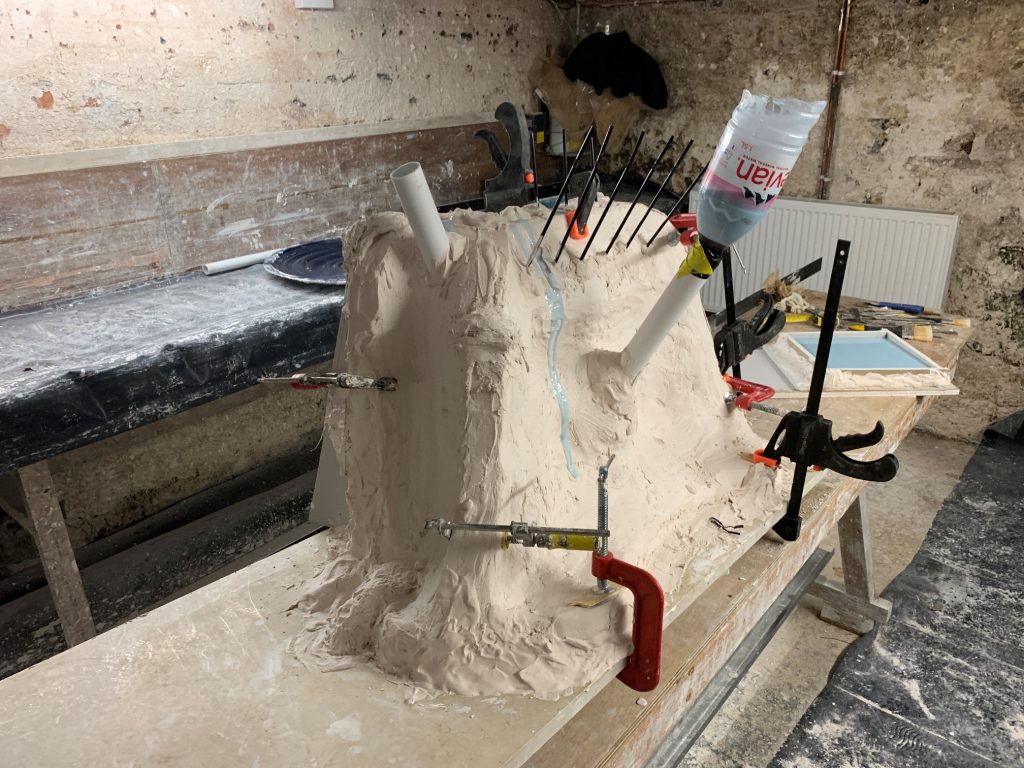
Now we have a clay layer completely covering the Master, you may notice we have also incorporated a clay rib stay, around the outer areas, set away from the main item edge of the item, approx 1.5 inch away which will be our silicon hangover or stay, seen only after the final stages
The next stage is apply cling film, this time on top of the Clay surface. smear lard (release agent) over the plasterboard edges, decide now if you want to make a one piece or 3 piece mould, if just one, then build up layers of Gypsum Casting plaster on top to make a Plaster case mould, embed with strips of hessian cloth for extra strength, layer up to a suitable gauge of plaster around 1.1/2 inch you can do serval coats, carefully sprise Case mould away.
(however if you want to make a 3 part case mould: 2 sides and a front) then do same as above only after making a fence at the corners with something like: plasterboard, incorporate them with 2 or 3 location lumps made of clay onto the plasterboards, grease these sides up with lard then cast the front section with Gypsum plaster, when set carefully remove the plasterboard fence which incorporates the location lugs, (not the Front casting) apply release agent (Lard) to the newly make plaster adjoining side prior to construction of the next side in plaster, remove 3 parts and clean
(as Photo shows below), then cast the sides in plaster, not disturbing the prior made Front cast. Remember if casting seperete parts: plaster to plaster, you must apply a release agaent like lard or talo
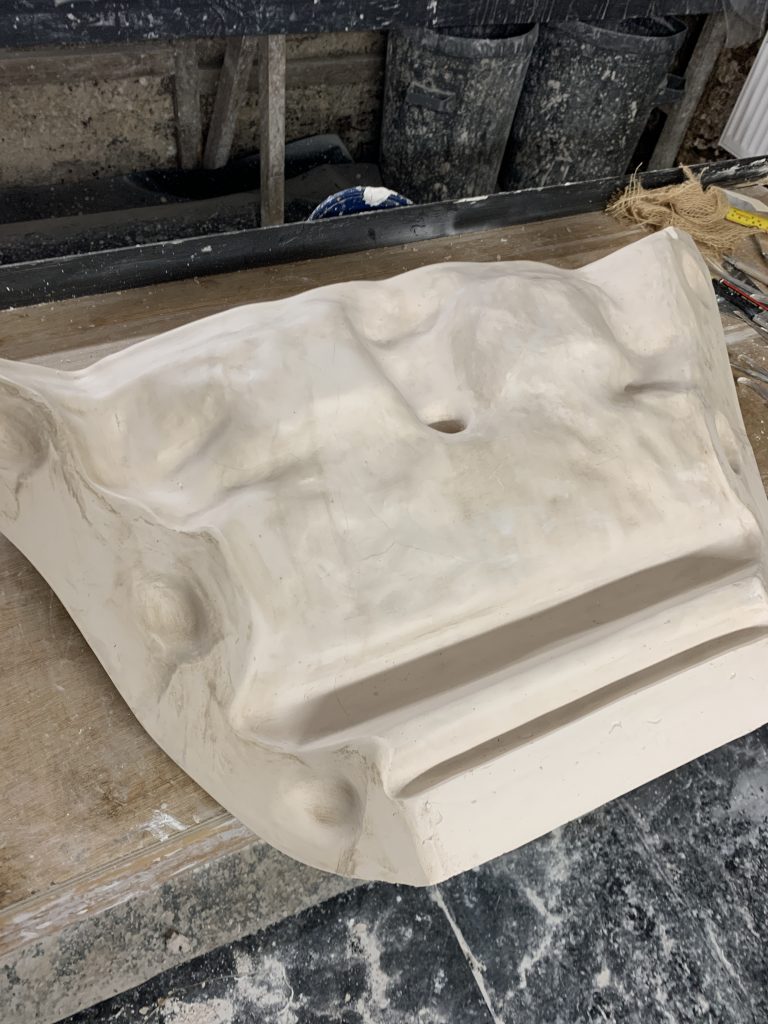
After making the Plaster Cast moulds, remove all parts, clean up the castings we now have a 3 section gypsum plaster cast mould ready to pour the Silicon
Lets say you have now a 3 part Plaster Casing mould which has turned out fine, cut 2 x holes 1.1/2″ top and middle of the case for pouring also drill a series of small holes highest points (we have a number of straws showing (so not to entrape any air as we pour Silicon, apply a release agent over the inside sections of the case mould also to pasterboard base & back, the Silicon is to go where the voids are showing on above photo, petrolium jelly is best used as the choice of release agent, last check then, re assemble all the sections with decorators caulk all around the edges, then clamp all the sections best you can, even mix more gypsum plaster and seal casing to the plasterboard (as below photo) mix and pour silicon to lower funnel so it to the highest point of the mould or past, this will ensure you have no air pockets, the straws also confirm by a gental blow, if there is resistance with silicon in straw area, all is well